Monday, October 20, 2014

Brioche - Sweet and Savoury

It's been a long time since I made these but after hearing someone retell a story about staying with us and the brioche I made, I thought it might be time to give this one another go.
The recipe is simple and I used the dough for both the sweet and the savoury version. The dough was made in the bread maker and then the completed brioche given time to rise in the oven. The rose during baking too.
They probably could have been glazed to make them look better but the still tasted great. They are best eaten in the day they are baked (straight out of the oven was pretty good) but are ok the next day warmed a little bit.

Brioche Dough
1 cup milk
3 tbs melted butter
2 eggs - plus enough milk to make 1/2 a cup
4 1/4 cups of high grade flour
1 tbs sugar
2 tsp yeast

Make dough in bread maker on dough setting.
Divide dough in half (if making half sweet, half savoury) and roll the dough out to roughly a 15cm by 30 cm rectangle.
Spread filling over the dough.
Roll dough up in a spiral to form a long sausage.
Slice into brioche slices (about 10 cm)
Place slices on tray covered in baking paper with space between ti allow for rising.
Bake at 200 degrees C for about 15 minutes

Sweet filling ideas

  • chopped white chocolate and frozen (or fresh) raspberries
  • brown sugar (or coconut sugar) and cinnamon
  • chopped dark chocolate and raisin
Savoury filling ideas
  • pesto, finely chopped mushroom, capsicum and cheese
  • cheese, bacon
  • cheese and pineapple
  • sundried tomato and feta cheese


Wednesday, October 15, 2014

Strawberry, Coconut, Raspberry Banana Bread

I've looked at different fruit bread recipes and thought they just seemed odd - not a cake and not a loaf but I've changed my mind. Isabella and I had a 'girls' holiday in Melbourne staying with friends. One morning walked to the local cafe for breakfast. The recommendation was the toasted rhubarb bread. I was not expected to be 'wowed', but I was!
We came back and I looked at a range of recipes to try. I wanted something that was not too unhealthy and this one appealed because it had chia seeds and lots of fruit in it.
I used fresh strawberries and frozen raspberries and 3 bananas.
We LOVE it and Isabella and I have had it for breakfast for the last three days - toasted with butter.
I'm going to try to reduce the sugar next time and probably use coconut sugar. The banana and fruit makes it sweet anyway.
This will also be a great breakfast recipe when we have people staying. It lasts well because we had it toasted. YUM
Thanks Lynn and Bec for the recommendation!


Strawberry, Coconut, Raspberry Banana Bread

INGREDIENTS
  • 1 3/4 cup all purpose flour
  • 1 teaspoon baking powder
  • 3/4 teaspoon baking soda
  • 1/4 teaspoon salt
  • 1 cup ripe mashed banana (about 2-3 bananas)
  • 1 tablespoon coconut oil, melted and cooled
  • 1/3 cup packed dark brown sugar
  • 2 teaspoons vanilla extract
  • 1 egg
  • 1/4 cup nonfat plain greek yogurt 
  • 2 tablespoons unsweetened almond milk (soy, coconut, or skim also work)
  • 3/4 cup diced organic ripe strawberries
  • 1/4 cup smashed organic raspberries (or you can use more strawberries)
  • 1/2 cup unsweetened coconut, plus 3 tablespoons for topping (sweetened is fine, too)
  • 2 tablespoons chia seeds
  • 2-4 strawberries, sliced for topping

INSTRUCTIONS
  1. Preheat oven to 350 F. Grease 9-inch loaf pan with cooking spray.
  2. In a large bowl, whisk together flour, baking powder, baking soda, and salt; set aside.
  3. In a seperate large bowl, beat together banana, brown sugar, egg, coconut oil vanilla, yogurt, and almond milk until smooth and creamy. Slowly add dry mixture to wet ingredients, and mix until combined. Gently fold strawberries, raspberries, coconut and chia seeds into the batter.
  4. Place batter in prepared loaf pan. Sprinkle top evenly with 3 tablespoons of coconut. Place sliced strawberries over the top of the bread. Bake for 50-65 minutes or until toothpick inserted into center comes out clean. Cool on wire rack for 20 minutes, then remove from pan and return to wire rack to finish cooling. Bread is even better the next day (they always are). Bread will stay fresh for a few days when wrapped tightly.

Thursday, July 10, 2014

Tamarillo Tarts with Honey and Ginger Mascarpone

We celebrated our wedding anniversary this week. Isabella and I got busy to cook a special dinner to celebrate. We had goats cheese and red onion tarts as a starter (sorry, no recipe...I just improvised with this), Chicken with Chorizo and Olives and this tart as a dessert.

We had spotted the tart in the most recent Cuisine magazine and decided to halve the recipe for the three of us. We served it with ice cream...I'm sure the mascapone would have been really yummy but ice cream was the best I could do...avoiding a trip out on a very cold wet and windy winter night!

I was amazed at how easily the tamarillos pealed with the method suggested in the recipe - a good trick to remember when using them in other dishes!

I added a thin slice to cover most of the top of the tart - the tamarillo flavour was a bit lacking - I'd probably layer the fruit on top a bit more next time...or follow the recipe better and make them a bit thicker! It was nice though to have the almond mixture showing through and getting bit browned.

The pastry was a bit undercooked on the bottom...I'd leave them in a bit longer next time.


Tamarillo Tarts with Honey and Ginger Mascarpone

Ingredients
1 x 350g-500g packet pre-rolled, made with butter puff pastry
200g butter, at room temperature
200g caster sugar, plus extra to sprinkle
3 large eggs
200g ground almond
80 grams flour
6 tamarillos
2 tablespoons honey
1 teaspoon ground ginger
150g mascarpone

Method
Spray 6 individual 11 cm tart moulds with oil. Cut circles from the pastry sheets to line each mould. Refrigerate.
Preheat oven to 160 degrees C.
Beat the butter and sugar until incorporated and slowly add the eggs one at a time, while beating.
Fold in the ground almond and flour. this is the filling.

Immerse the tamarillos in bolding water for 10 seconds, then plunge into cold water.
Peel  and cut into 5mm slices.
Remove the tart moulds from the fridge and half fill each with the filling.
Arrange the tamarillo slices on top and sprinkle with caster sugar.

Put tarts on a banking
tray and bake for 30 minutes until the base of each tart is golden (check by gently lifting each tart out from base). Dust with icing sugar.

While the tarts are baking, whisk the honey and ginger into the mascarpone. Taste and add more honey or ginger if desired.
Serve the tarts warm and topped with a dollop of the mascarpone.

Cauliflower Pizza Base - Gluten Free

The Cauliflower craze seems to be everywhere I look so I decide to give it a go. We have a family member who has been diagnosed as Celiac so when she was coming for a pre rugby game meal where we were cooking pizzas this seemed like a great chance to give it a try.

It was a lot of preparation! Removing the liquid took ages!
The recipe cooked the cauliflower by baking in the oven - I used the microwave.
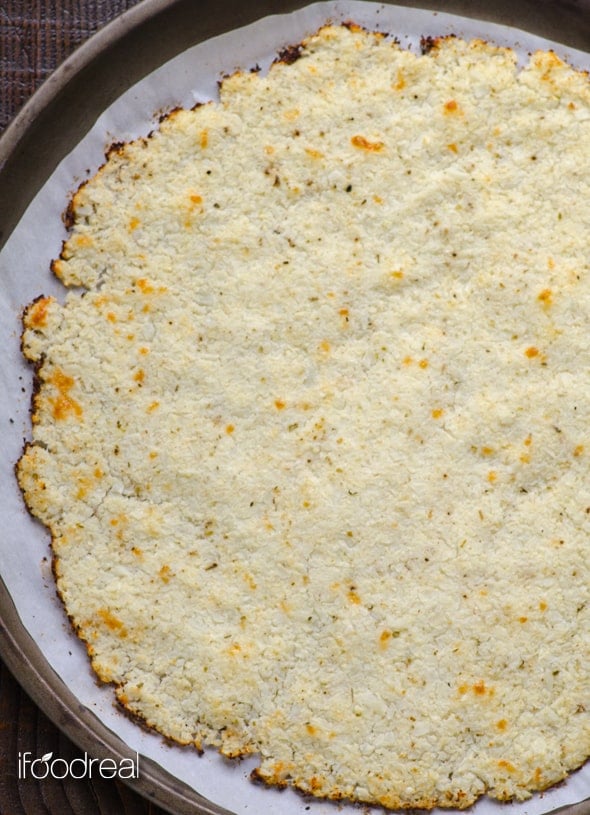
The pizza crust was really nice but you have to change your expectations from a bread based crust to something totally different.
It seemed really strange cooking the base then adding toppings and cooking again but it worked.

I can imagine doing these again as a snack or nibbles dish.


Cauliflower Pizza Base - Gluten Free
Ingredients
  • 1 head cauliflower 
  • 1 egg, large
  • 1/2 cup Parmesan or Mozzarella cheese, grated/shredded & not packed
  • 1 tsp Italian (or rosemary, basil, parsley) herb seasoning
  • 1/8 tsp salt
  • 1/4 tsp freshly ground black pepper
Directions
  1. Preheat oven to 180 degrees C and line round pizza baking sheet with parchment paper.
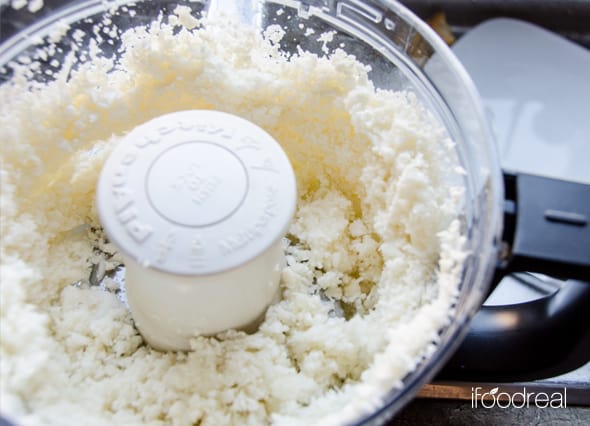
  2. Rinse cauliflower, remove the outer leaves and separate into florets with a paring knife. Place cauliflower florets in a food processor and process until "rice" texture. Some coarse chunks are fine.
  3. Place on a prepared baking sheet and bake for 15 mins. Or steam in the microwave until cooked

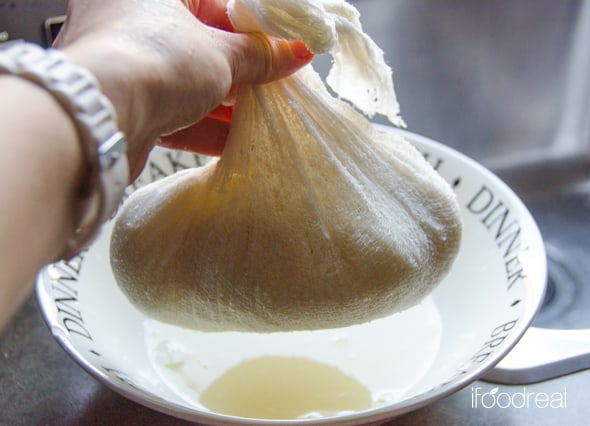
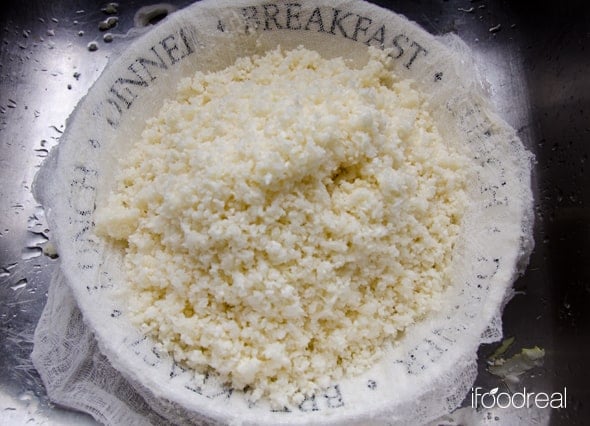
  4. Remove cooked cauliflower from the oven and transfer to a bowl lined with a double/triple layered cheesecloth.
  5. Then squeeze the liquid out of the ball, cauliflower inside the cheesecloth, as hard as you can. Be patient and do this a few times until barely any liquid comes out. Muscle work.:)
  6. Increase oven T to 200 degrees C. Transfer cauliflower to a mixing bowl along with egg, cheese, herb seasoning, salt, black pepper and mix to combine. Transfer cauliflower mixture onto the same baking sheet you used to roast the florets (I used the same parchment paper but you can swap it for a new one if it gets too soggy), and flatten with your hands until thin pizza crust forms.
  7. Bake for 15 - 20 minutes and remove from the oven.
  8. Top with your favourite toppings and bake again until cheese on top turns golden brown. Slice and enjoy.
  9. Storage Instructions: Refrigerate covered for up to 2 days. You can also freeze the crust tightly wrapped in plastic, for 1 month.

Pot Roasted Chicken With Garlic and Rosemary - Manu's Chicken

I'm an avid watcher of reality TV cooking programmes - currently My Kitchen Rules where Manu Feildel is one of the judges. His catch cry is 'it need more sauce' and I have to agree! I love really rich sauces with dishes.

This recipe looked pretty easy and perfect for a cold winter evening.
I loved the sauce (...and the rest of the dish). It was really intense and garlicky.
I served it with smashed potatoes - also really garlicky!


Pot Roasted Chicken With Garlic and Rosemary - Manu's Chicken

Ingredients
1 tablespoon plain flour
2 teaspoons of sweet paprika
4 chicken marylands (leg and thigh portion)
1 1/2 tablespoons of olive oil
12 cloves of garlic, unpeeled
4 sprigs of rosemary
1/2 cup of white wine
1 1/2 cups of chicken stock
50 grams of butter
roast potatoes to serve

Mix together
flour and paprika with sea salt and freshly ground black pepper to taste, then coat the chicken.
Preheat the oven to 180 degrees celsius.
Heat an enamelled cast iron casserole dish over a med-high heat then add the olive oil. Fry the chicken, skin side down, for about 4-5 minutes or until golden brown, then turn and cook for another 4-5 minutes till golden brown.
Add the garlic, rosemary and wine, bring to the boil, then transfer to the oven to cook for 45 minutes or until the chicken is cooked through..
Transfer to the chicken , garlic and rosemary to a plate and cover with foil to keep warm.
Place the casserole over a high heat and simmer the sauce for about 7 minutes or until reduced by half to a sauce consistency.
Whisk in the butter, then taste and season if desired.
Serve the chicken with the sauce, peeled garlic cloves and roast potatoes.


Almond and Pear Galette

With a abundance of pears I went looking for a recipe that would use things I already had in the house. This one was a real find. We loved it.
I didn't include the Dulce de Leche which I think from hunting online is a bit like caramelised condensed milk. It might be a nice addition when I make it again.
I think that lots of different fruits could be used...maybe even feijoas when they are in season again.


Almond Pear Galette with Dulce de Leche
Pastry - your favourite recipe or this one or this one.  

Crust:
1 1/2 cups all purpose flour
1/2 cup plus 3 tbsp butter, cold, cut into 1/2" cubes
3 tbsp icing sugar
2 egg yolks
1 tbsp lemon juice
1 tbsp plus 1 1/2 tsp cold water

Cream:
1 large egg white
3 tbsp powdered sugar
4 tbsp finely ground almonds
4 tbsp melted butter
1/2 tsp almond extract

Filling:
3 firm, ripe pears such as Bosc or Bartlett, peeled, cored and cut into 1/4 inch thick slices
2 tbsp fresh lemon juice
3 tsp lemon zest
1 tsp ground star anise
1/2 tsp ground cinnamon
pinch of salt 

1/4 cup sugar (I used coconut sugar, but granulated or cane sugar would work as well) 
4 tsp butter, cut into small pieces
1/2 cup dulce de leche

To make the pastry, combine the flour, butter, and icing sugar in a food processor and pulse until crumbly.  In a small bowl, beat the egg yolks with the lemon juice and water.  Add to the flour mixture, with the motor running.  Dough should be soft.  Gather into a disc, wrap in plastic.
Pastry should be chilled in fridge for at least one hour. 

For the cream:  whisk together egg white and powdered sugar in a bowl until frothy, about a minute.  Stir in almonds, butter, almond extract.  Whisk and refrigerate. 

For the filling:  toss pears with lemon juice, zest, spices and salt. 

Preheat oven to 375*F.  Roll pastry out on a lightly floured counter.  You are aiming for about 12 inches diameter.  Line a bakesheet with parchment paper.  Fold your pastry in half and gently lift onto the bakesheet.  Lay it out flat.  Spread the cream evening, leaving a 1-inch border.  Arrange pear slices in concentric circles over the cream.  Sprinkle with sugar and sprinkle bits of butter on top of pears.  Fold edges of pastry over pears.  Bake for about 30-35 minutes until golden and pears tender.  Dollop the dulce de leche on tart and put it back in oven for another 5 minutes, just so it's melted.  Remove from oven and if you like, take your pastry brush and gently brush the dulce so it evenly covers the surface of tart.  Let it stand for 5 minutes, then place on cooling rack to cool completely.  Serve at room temp with a little whipped cream or ice cream.  Serves 6-8. 

Quick Steamed Jam Pudding

My weeks usually finish with me exhausted on the couch with a glass of wine watching 'Better Homes and Gardens' - quite a contrast to how Friday nights were in previous years! I'm doing well if I can make it to the end of the show.

A few weeks ago this recipe came up and it looked like a great quick one to make. You can watch the video of it here! Surprisingly it is made in the microwave with a very, very short cooking time.
I'm not a huge fan of stodgy hot puddings but this was a hit with the family. I made it in quite large coffee cups. It would probably be better in smaller cups.

We used jam and passionfruit curd - both were really nice.
It definately needs custard to serve it with.


Quick Steamed Jam Pudding 
Ingredients
115 g butter
1/2 cup caster sugar
2 eggs
1 cup self raising flour
1/3 cup Milk
1/4 teaspoon Vanilla
1 tablespoon Jam per serve

Method
Beat butter and sugar until well combined and light.
Add eggs and mix until combined
Fold in the flour, milk and vanilla
Grease the cups with butter
Spoon about tablespoon of jam into the bottom of each cup.
Add the mixture carefully by spooning it around the sides first, then finally in the middle to prevent the jam being pushed up the sides.
Cover with a paper towels
Cook at 700 watts for about 5 mins (about 70 % power)

Make sure it is cooked on top by gently pressing
Run a knife around the edges then invert on a plate.

Serve with custard.